Whenever you are adding signature to an email, you provide it a personal touch. If you don’t know how to add the signature then we will tell you exactly how to add signature in Outlook.
Does the email signature add value to you and your company brand?
The Answer is Yes. Especially on the professional level. When most of your personal & business communication happens through application services like outlook. You must know How To Add Signature in Outlook?
If you are a company owner or a freelance artist. It’s important to promote your company and yourself. That’s what when adding an email signature under your emails comes handy and works as a promoting tool.
The email signature includes your company logo by which people start recognizing you and your brand. You can also include your contact details so that more people can connect with your brand.
You can take the example of big brands, such as Microsoft and Google. You can see the email of their employees, as they always add an email signature at the end of emails footnote.
How to Add Signature in Outlook with Different Version
In this blog, we are covering the followings topics for Outlook users from the latest version to the prior outlook versions:
- How to Add Signature in Outlook 365
- How to Add Signature in Outlook 2019
- How to Add Signature in Outlook 2016
- How to Add Signature in Outlook 2013
- How to Add Signature in Outlook 2010
- How to Add Signature in Outlook 2007
How to Add Signature in Outlook 365
If you are using Outlook 365 (latest version) and looking solution for How To Add Signature in Outlook 365.
Here, are some steps to follow to add signature in Outlook 365:
- Open your Outlook software.

- Press Ctrl+ N to compose New Mail.
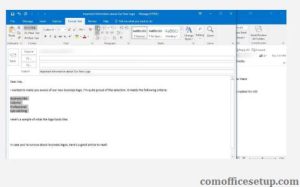
- Mail Window will appear. Select the Message option from the title bar.
- Locate the Signature option
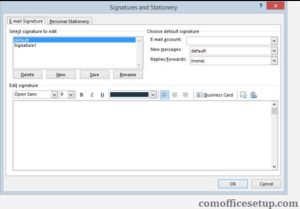
- You will again have a new signature & stationery window.
- Punch your click on the New option.
- You have to Name the signature and confirm it with Ok.
- You can add the signature by mentioning the info in the edit signature section.
- You can also use tools to link any designed photo or image for your signature.
Note: You have to make one change only before your confirmation changes. Go to the New Message option (given on the right side of the signature & stationery window). Select the pull-down arrow and select your signature name. So, whenever you compose an email to someone, your signature appears on the footnote of your mail. Thus, How To Add Signature in Outlook 365 (Latest Version).
How to Add Signature in Outlook 2016/2019
If you are using Outlook 2019/ Outlook 2016 and looking solution for How To Add Signature in Outlook 2016/2019.
Here, are some steps to follow to add signature in outlook 2016/2019:
- Start the Outlook app on your system.
- Go for the File Menu and choose the Options tab.
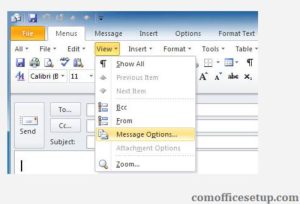
- You can choose the Signature tab to change and create a new signature.
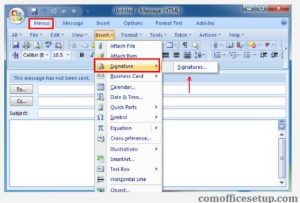
- You have to create a new signature. Thus, choose the New button.
- Select any name for your signature.
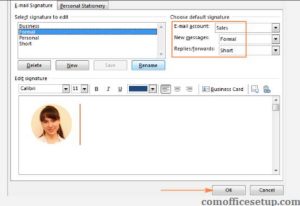
- Enter the Signature details in section (Edit signature) below.
- Hit on Ok to save your signature.
If you have followed the steps. You can easily know How To Add Signature in Outlook 2019/ Outlook 2016.
How to Add Signature in Outlook 2013
Outlook 2013 is one of the prior versions of outlook. But still popularly in use. And if you are using Outlook 2013 and looking solution for How To Add Signature in Outlook 2013. The solution given below is definitely for your use.
Here, are some steps to follow to add signature in outlook:
- Open the Microsoft Presentation Tool.
- You can design your signature on it.
- Now, access your outlook app console.
- Open the Outlook File tab and select it.
- Choose the Mail button and select the Options tab from it.
- Then search for the Signature key and open it.
- Select the New Key.
- The window for Signature name will appear. Name it.
- Use the Tools option from the Edit Signature bar.
- Insert your designed signature into the Edit Signature section.
- Hit the Ok key to save changes in your signature.
Now, you know How To Add Signature in Outlook 2013. With the same procedure, you can replace your old signature with a new signature without any issue.
How to Add the Signature in Outlook 2010/2007
(Older Outlook Version)
Outlook 2010 and Outlook 2007, both are one of the prior versions of outlook software. Rarely in use by people. But we still consider our reader’s needs. And if you are using Outlook 2010 and Outlook 2007 and looking solution for How To Add Signature in Outlook 2010/2007.
Here, are some steps to follow to add signature in outlook:
- Access your Outlook application.
- Select the File button and Go to the Options tab (Left corner).
- When you choose the Options tab, Outlook Option Window will appear.
- Choose the Mail tab.
- Then, choose the Signature option from the right-side section below.
- You can replace the older signature with new by selecting New Tab.
- Write Your Signature’s message body on the outlook Edit Signature section.
- Select Ok key and save the changes.
Now, you know How To Add Signature in Outlook – in all versions from Outlook 365 (latest version) to Older Version of Outlook i.e Outlook 2007.
Also Read: How to Add Outlook Email to iPhone 7 and 8

